##iOS7-iOS10的情况
使用frame布局的情况
UITableView *tableView = [[UITableView alloc]initWithFrame:CGRectZero style:UITableViewStylePlain];
tableView.frame = [UIScreen mainScreen].bounds;
[self.view addSubview:tableView];
默认情况下self.automaticallyAdjustsScrollViewInsets = YES;
| 情形 | contentInset |
| --- | --- | --- |
| 没有导航条和StatusBar | {0, 0, 0, 0} |
| 有导航条,有StatusBar | {64, 0, 0, 0} |
| 没有导航条,有StatusBar | {20, 0, 0, 0} |
| 有导航条,没有StatusBar | {44, 0, 0, 0} |
| 有tabbar的情况 | {xx, 0, 49, 0} |
不得不提viewController的edgesForExtendedLayout
self.edgesForExtendedLayout = UIRectEdgeNone;
如果设置为UIRectEdgeNone,那么滚动视图contentInset的值始终为0。
根据实际需求:
1). 保留半透明的效果
缺点:但是只有滚动视图,才有这个效果。如果非滚动视图,在frame布局的情况就需要把坐标从(0,64)开始算了。
2). 取消半透明效果
tabBar和navigationBar的translucnet属性都改为NO.
缺点:需要计算显示视图实际的高度。如满屏大小的tableview高度=屏幕高度-64px-44px,否则会显示不全。
使用autolayout
1). 默认情况:
self.automaticallyAdjustsScrollViewInsets = YES;
使用VFL布局(tableView撑满):
UITableView *tableView = [[UITableView alloc]initWithFrame:CGRectZero style:UITableViewStylePlain];
[self.view addSubview:tableView];
tableView.backgroundColor = [UIColor lightGrayColor];
tableView.delegate = self;
tableView.dataSource = self;
self.myTableView = tableView;
tableView.translatesAutoresizingMaskIntoConstraints = NO;
NSArray *constraints1 = [NSLayoutConstraint constraintsWithVisualFormat:@"H:|[tableView]|" options:0 metrics:nil views:@{@"tableView":tableView}];
NSArray *constraints2 = [NSLayoutConstraint constraintsWithVisualFormat:@"V:|[tableView]|" options:0 metrics:nil views:@{@"tableView":tableView}];
[self.view addConstraints:constraints1];
[self.view addConstraints:constraints2];
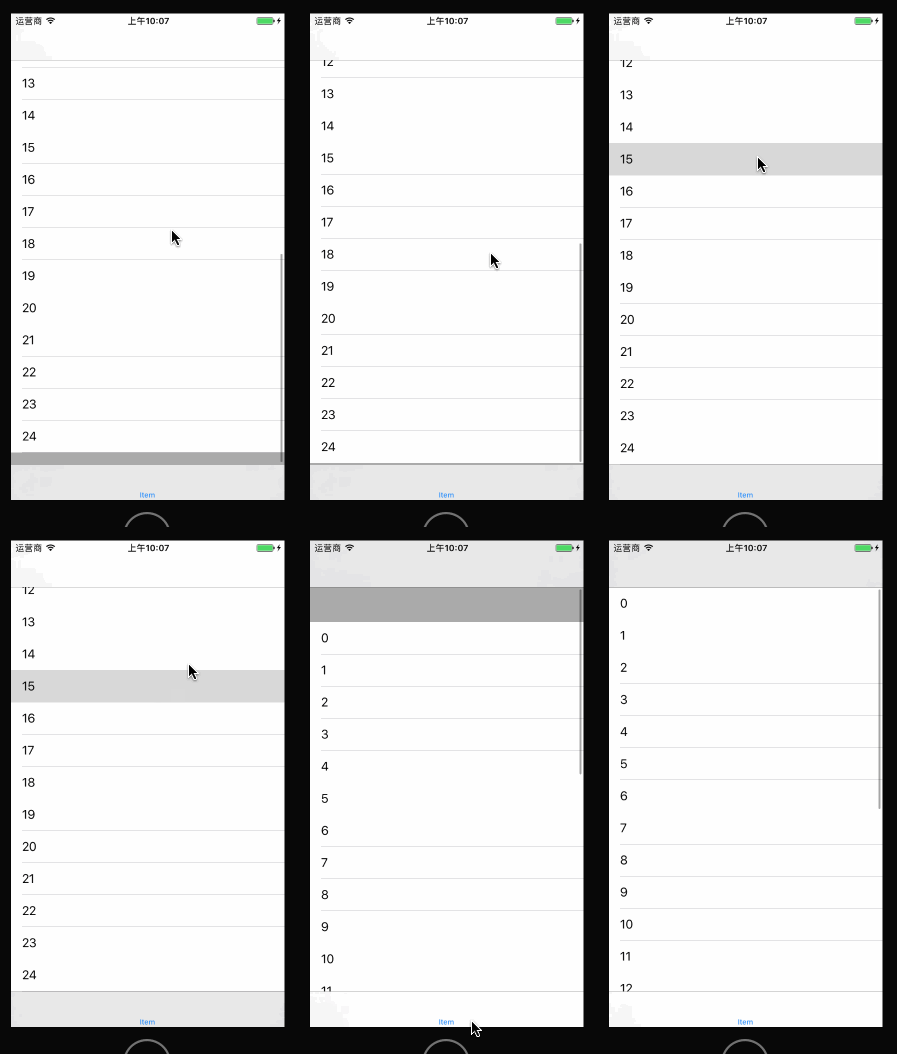
2). self.automaticallyAdjustsScrollViewInsets = NO 的情况。
可以发现tableview的大小没有变化。 但是显示不全,被tabbar和navgationbar遮挡。
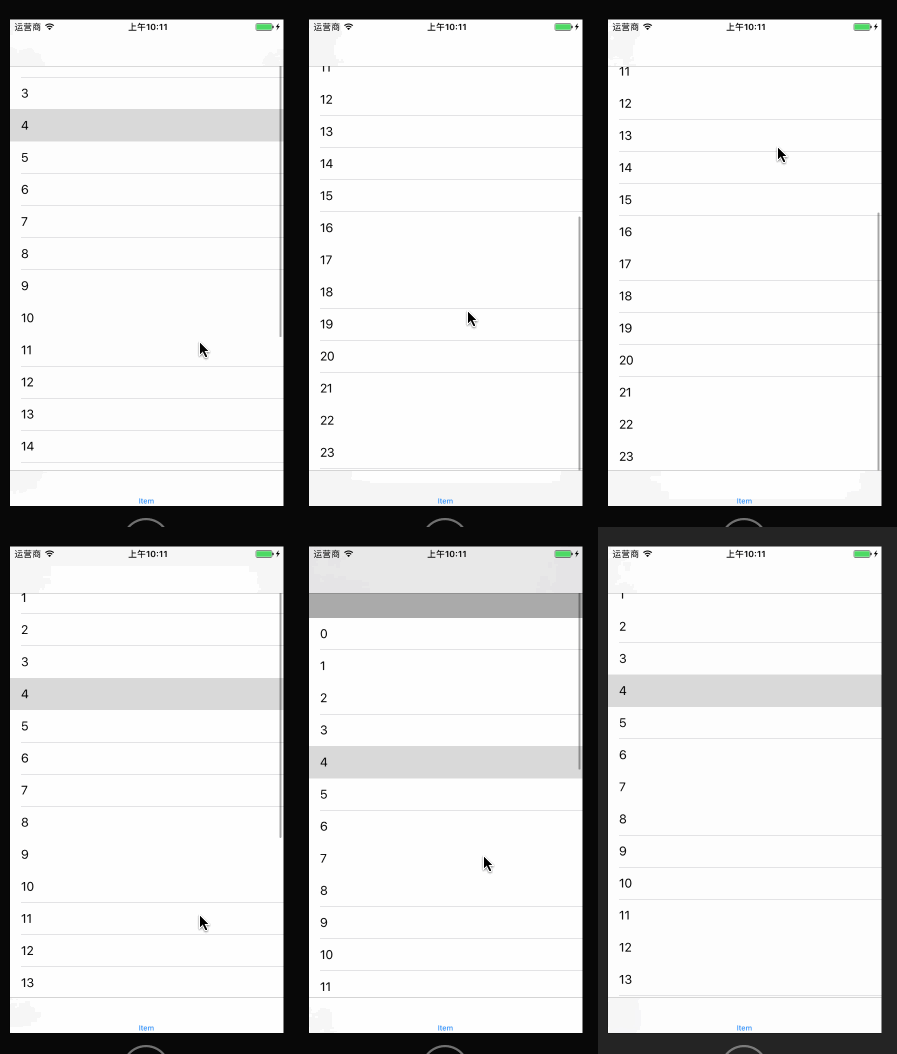
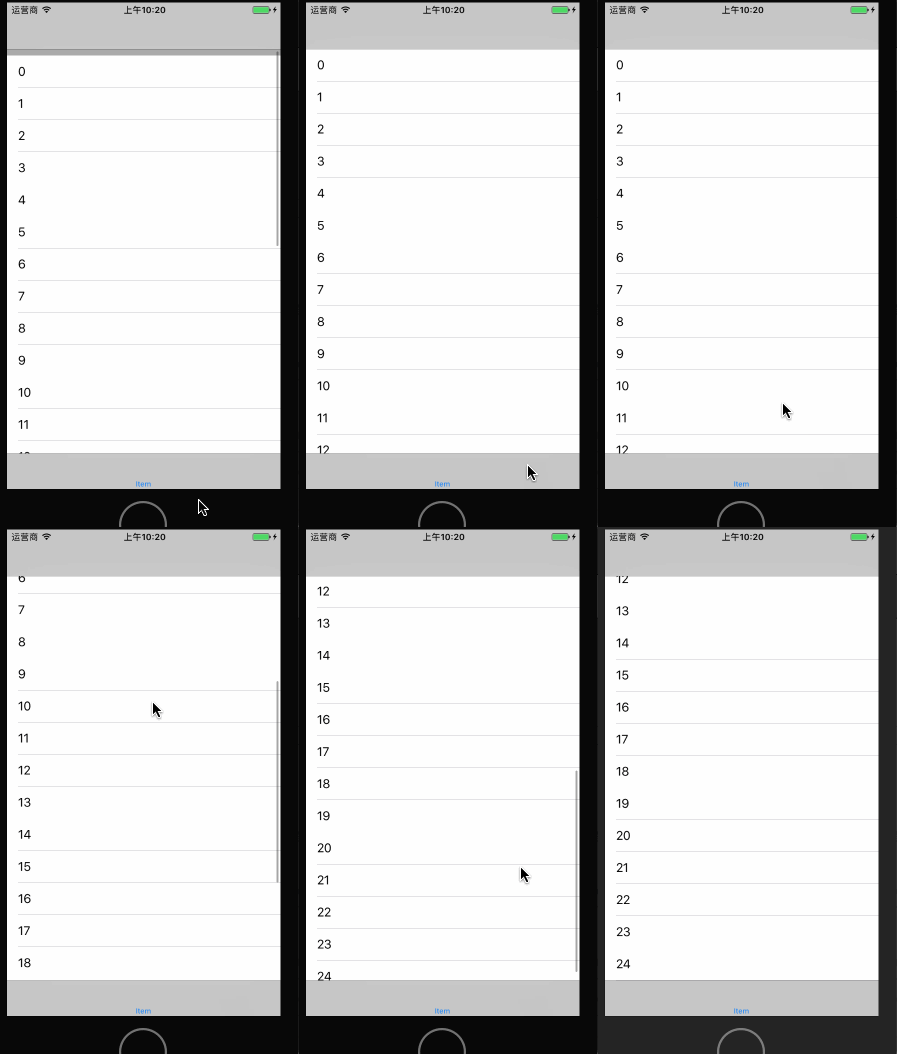
3). self.edgesForExtendedLayout = UIRectEdgeNone的情况:
布局方式发生了变化,顶部从导航条左下位置(0,64)开始布局,一直到tabbar上方位置。
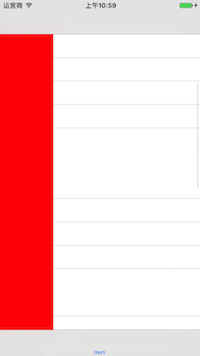
4). 辅助约束 topLayoutGuide ,bottomLayoutGuide
    id guide = self.topLayoutGuide;
    id bottomGuide = self.bottomLayoutGuide;

    UIView *redView = [[UIView alloc]init];
    redView.backgroundColor = [UIColor redColor];
    [self.view addSubview:redView];

    redView.translatesAutoresizingMaskIntoConstraints = NO;

    NSArray *constraintsA = [NSLayoutConstraint constraintsWithVisualFormat:@"H:|[redView(==width)]" options:0 metrics:@{@"width":@100} views:@{@"redView":redView}];
    [self.view addConstraints:constraintsA];
    NSArray *constraintsC = [NSLayoutConstraint constraintsWithVisualFormat:@"V:[guide][redView][bottomGuide]" options:0 metrics:nil views:NSDictionaryOfVariableBindings(guide,redView,bottomGuide)];
    [self.view addConstraints:constraintsC];
iOS11
1). topLayoutGuide ,bottomLayoutGuide 被标为过期,但是应该还能用。

2). automaticallyAdjustsScrollViewInsets被完全废弃,不再改变contentInset的值。

如下:
@property(nonatomic,assign) BOOL automaticallyAdjustsScrollViewInsets API_DEPRECATED_WITH_REPLACEMENT("Use UIScrollView's contentInsetAdjustmentBehavior instead", ios(7.0,11.0),tvos(7.0,11.0));
UIScrollView新增属性:
1). adjustedContentInset表示当前的偏移量。
2). 增加了 contentInsetAdjustmentBehavior 这个属性,默认为 UIScrollViewContentInsetAdjustmentAutomatic
不需要自动调整可以设置:
#if __IPHONE_OS_VERSION_MAX_ALLOWED >= 110000
if (@available(iOS 11.0, *)) {
ableView.contentInsetAdjustmentBehavior = UIScrollViewContentInsetAdjustmentNever;
} else {
}
#endif
不需要导航条半透明效果时可以配合它来使用:
self.edgesForExtendedLayout = UIRectEdgeNone;
关于 Safe Area
class UIView {
    var safeAreaLayoutGuide: UILayoutGuide { get }
    var safeAreaInsets: UIEdgeInsets { get }
    func safeAreaInsetsDidChange()
}
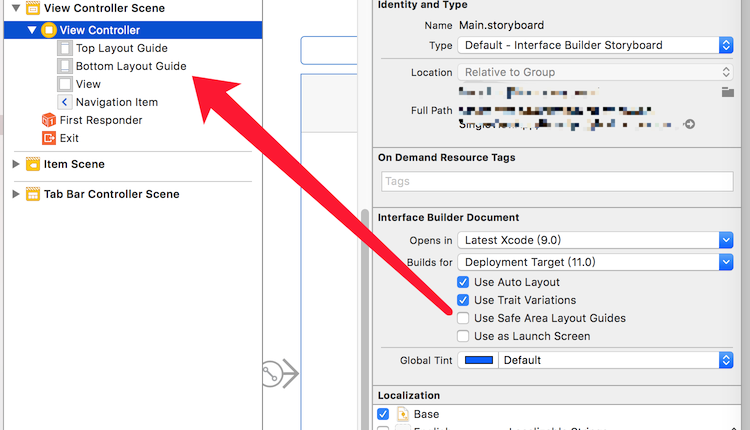
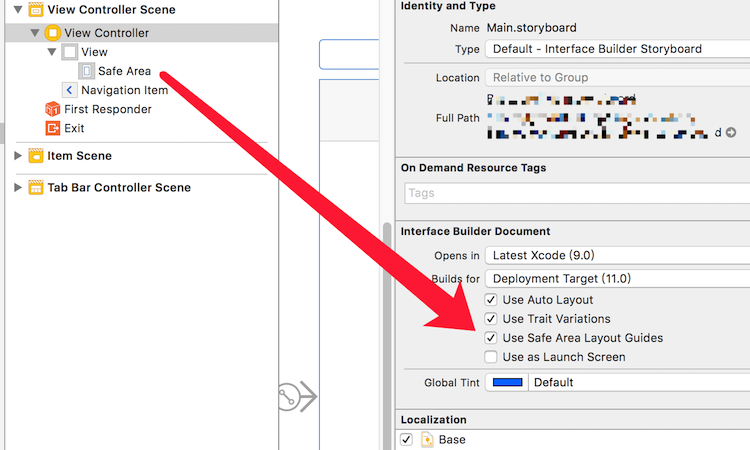
勾选 Use Safe Area Layout Guides ,Top Layout Guide 和 Bottom Layout Guide 会被替换为 Safe Area.
需要实现实现对应view的代理方法-tableView: viewForHeaderInSection: 否则高度的代理方法不会调用。
- (UIView *)tableView:(UITableView *)tableView viewForHeaderInSection:(NSInteger)section{
    return [UIView new];
}

- (CGFloat)tableView:(UITableView *)tableView heightForHeaderInSection:(NSInteger)section{
    return 0.01;
}
Self-Sizing
未完待续