基本步骤:
1). 创建一个GraphicsLayer (AGSGraphicsLayer /AGSSketchGraphicsLayer),并添加到mapView上(addMapLayer)
2). 实例化AGSGraphic。 AGSGraphic可以描述几何形状geometry和特征symbol
3). 将AGSGraphic 添加到 GraphicsLayer上
绘图
先添加GraphicsLayer
 let myGraphicsLayer = AGSGraphicsLayer.init()
self.mapView.addMapLayer(myGraphicsLayer, withName: "myGraphicsLayer")
点
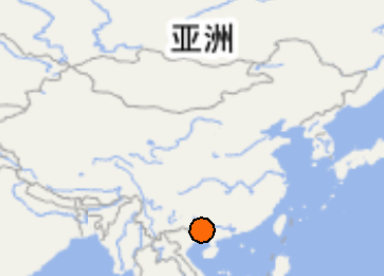
添加单纯的点:
let myMarkerSymbol = AGSSimpleMarkerSymbol()
myMarkerSymbol.color = UIColor.orange
let point = AGSPoint.init(x: 108.372445, y: 22.824739, spatialReference: self.mapView.spatialReference)
let graphic = AGSGraphic.init(geometry: point,
symbol: myMarkerSymbol,
attributes: nil);
myGraphicsLayer.addGraphic(graphic)
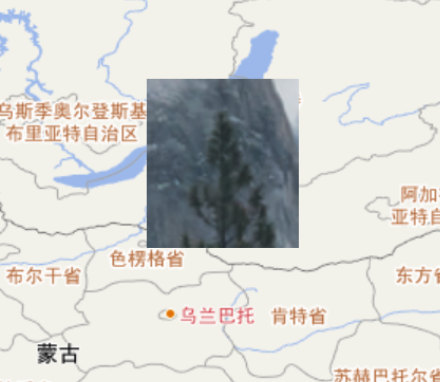
添加图片作为点:
let pic = AGSPictureMarkerSymbol.init(image: UIImage.init(named: "cc"))
let point2 = AGSPoint.init(x: 108.382445, y: 52.124739, spatialReference: self.mapView.spatialReference)
let graphic2 = AGSGraphic.init(geometry: point2, symbol: pic, attributes: nil)
myGraphicsLayer.addGraphic(graphic2)
线
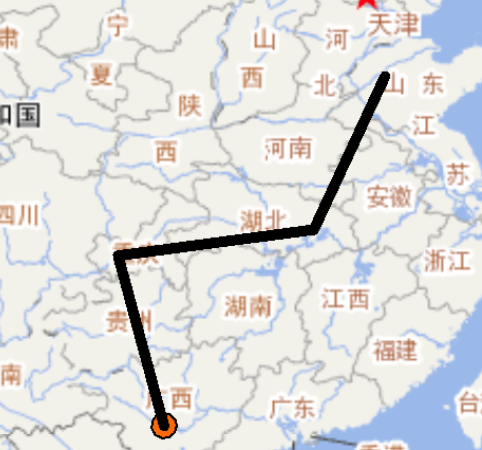
线AGSSimpleLineSymbol由多个点组成
let lineSymbol = AGSSimpleLineSymbol.init(color: UIColor.black, width: 5.0)
let ref = self.mapView.spatialReference
let mutableLine = AGSMutablePolyline.init(spatialReference:ref)
mutableLine?.addPathToPolyline()
mutableLine?.addPoint(toPath: AGSPoint.init(x: 108.372445, y: 22.824739, spatialReference: ref))
mutableLine?.addPoint(toPath: AGSPoint.init(x: 106.550464, y: 29.563761, spatialReference: ref))
mutableLine?.addPoint(toPath: AGSPoint.init(x: 114.305215, y: 30.592935, spatialReference: ref))
mutableLine?.addPoint(toPath: AGSPoint.init(x: 117.120098, y: 36.6512, spatialReference: ref))
let graphics3 = AGSGraphic.init(geometry: mutableLine, symbol: lineSymbol, attributes: nil)
myGraphicsLayer.addGraphic(graphics3)
面
let mutablePolygon = AGSMutablePolygon.init(spatialReference: ref)
mutablePolygon?.addRingToPolygon()
mutablePolygon?.addPoint(toRing: AGSPoint.init(x: 90, y: 10, spatialReference: ref))
mutablePolygon?.addPoint(toRing: AGSPoint.init(x: 90, y: 30, spatialReference: ref))
mutablePolygon?.addPoint(toRing: AGSPoint.init(x: 50, y: 30, spatialReference: ref))
mutablePolygon?.addPoint(toRing: AGSPoint.init(x: 50, y: 10, spatialReference: ref))
lineSymbol?.color = UIColor.red
let graphics4 = AGSGraphic.init(geometry: mutablePolygon, symbol: lineSymbol, attributes: nil)
myGraphicsLayer.addGraphic(graphics4)
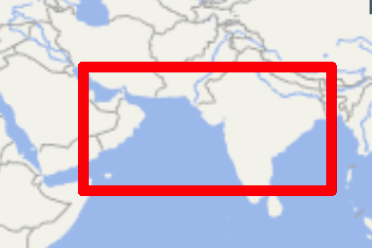
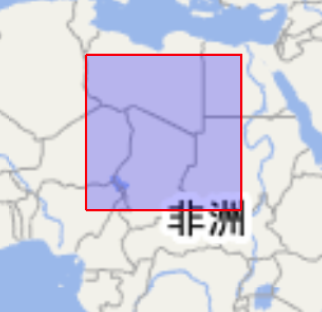
可以使用AGSSimpleFillSymbol来指定填充色
let env = AGSEnvelope.init(xmin: 10, ymin: 10, xmax: 30, ymax: 30, spatialReference: ref)
let fillSymbol = AGSSimpleFillSymbol.init(color: UIColor.init(red: 0, green: 0, blue: 1, alpha: 0.2), outlineColor: UIColor.red)
let graphics5 = AGSGraphic.init(geometry: env, symbol: fillSymbol, attributes: nil)
myGraphicsLayer.addGraphic(graphics5)
renderer
简单的renderer
可以给graphicsLayer设置统一的symbol.
如果初始化AGSGraphic时,没有指定symbol,那么就会生效。
func addSimpleRender( _ graphicsLayer:AGSGraphicsLayer){
    let fillSymbol = AGSSimpleFillSymbol.init(color: UIColor.init(red: 0, green: 0, blue: 1, alpha: 0.2), outlineColor: UIColor.red)
    let mySimpleRenderer = AGSSimpleRenderer(symbol: fillSymbol)
    graphicsLayer.renderer = mySimpleRenderer
}
AGSSimpleRenderer 是只读的
breaks renderer
breaks renderer 某个数字属性的值来标记每个图形。具有相似属性值的图形将获得相同的符号。 “中断”定义符号体系更改的值。
可以定义不同的阈值来使用不同的symbol
func addSimpleRender( _ graphicsLayer:AGSGraphicsLayer){
let ref = self.mapView.spatialReference
let fillSymbolLow = AGSSimpleFillSymbol.init(color: UIColor.init(red: 0, green: 0, blue: 1, alpha: 0.2), outlineColor: UIColor.red)
let fillSymbolMiddle = AGSSimpleFillSymbol.init(color: UIColor.init(red: 1, green: 0, blue: 0, alpha: 0.2), outlineColor: UIColor.yellow)
let fillSymbolHigh = AGSSimpleFillSymbol.init(color: UIColor.init(red: 0, green: 1, blue: 0, alpha: 0.2), outlineColor: UIColor.green)
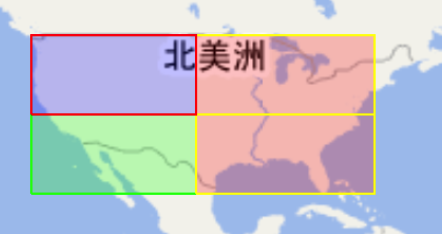
let env1 = AGSEnvelope.init(xmin: -125, ymin: 25, xmax: -100, ymax: 37, spatialReference: ref)
let env2 = AGSEnvelope.init(xmin: -100, ymin: 25, xmax: -73, ymax: 37, spatialReference: ref)
let env3 = AGSEnvelope.init(xmin: -100, ymin: 37, xmax: -73, ymax: 49, spatialReference: ref)
let env4 = AGSEnvelope.init(xmin: -125, ymin: 37, xmax: -100, ymax: 49, spatialReference: ref)
let graphics1 = AGSGraphic.init(geometry: env1,
symbol: nil,
attributes: ["Name":"美国env1", "Score":"10000"])
let graphics2 = AGSGraphic.init(geometry: env2,
symbol: nil,
attributes: ["Name":"美国env2", "Score":"8000"])
let graphics3 = AGSGraphic.init(geometry: env3,
symbol: nil,
attributes: ["Name":"美国env3", "Score":"6000"])
let graphics4 = AGSGraphic.init(geometry: env4,
symbol: nil,
attributes: ["Name":"美国env4", "Score":"4000"])
graphicsLayer.addGraphic(graphics1)
graphicsLayer.addGraphic(graphics2)
graphicsLayer.addGraphic(graphics3)
graphicsLayer.addGraphic(graphics4)
let cityRenderer = AGSClassBreaksRenderer()
cityRenderer.field = "Score"
cityRenderer.minValue = DBL_MIN
let lowClassBreak = AGSClassBreak(label: "Low", description: "", maxValue: 4000, symbol: fillSymbolLow)
let mediumClassBreak = AGSClassBreak(label: "Medium", description: "", maxValue: 8000, symbol: fillSymbolMiddle)
let highClassBreak = AGSClassBreak(label: "High", description: "", maxValue: DBL_MAX, symbol: fillSymbolHigh)
cityRenderer.classBreaks = [lowClassBreak, mediumClassBreak, highClassBreak]
graphicsLayer.renderer = cityRenderer
}
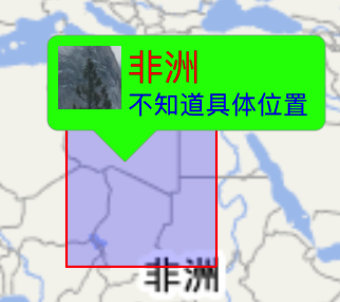
callout
无论用户何时点击地图上的地图项,都会查询标注的delegate是否应为该地图项显示标注。
该delegate不仅控制标注的显示,还可以通过修改AGSCallout对象的属性来自定义标注中显示的信息。
该功能必须属于支持hit-testing的图层。
这些层实现协议AGSHitTestable,例如AGSGraphicsLayer。
如果某个图层不支持点击测试,则该地图无法检测用户是否轻按某个功能,并且通常无法启动该过程以显示该图标的标注。
默认情况下,callout的delegate是未初始化的。这意味着在标注中没有要显示的信息,即使用户点击任何功能,地图也不会显示标注。
要显示标注,您需要将你的其中一个类设置为callout的delegate。
设置代理:
myGraphicsLayer.calloutDelegate = self
代理实现:
extension ArcgisMapViewController : AGSLayerCalloutDelegate {
func callout(_ callout: AGSCallout!, willShowFor feature: AGSFeature!, layer: (AGSLayer & AGSHitTestable)!, mapPoint: AGSPoint!) -> Bool {
mapView.callout.isAccessoryButtonHidden = false
mapView.callout.accessoryButtonType = .custom
mapView.callout.color = UIColor.green
mapView.callout.titleColor = UIColor.red
mapView.callout.detailColor = UIColor.blue
mapView.callout.title = feature.attribute(forKey: "Name") as? String
mapView.callout.detail = feature.attribute(forKey: "Address") as? String
mapView.callout.image = UIImage(named: "cc")
return true
}
}
